
As an Amazon Associate I earn from qualifying purchases. Product links on this page may be affiliate links.
Last Updated on 2026-06-11
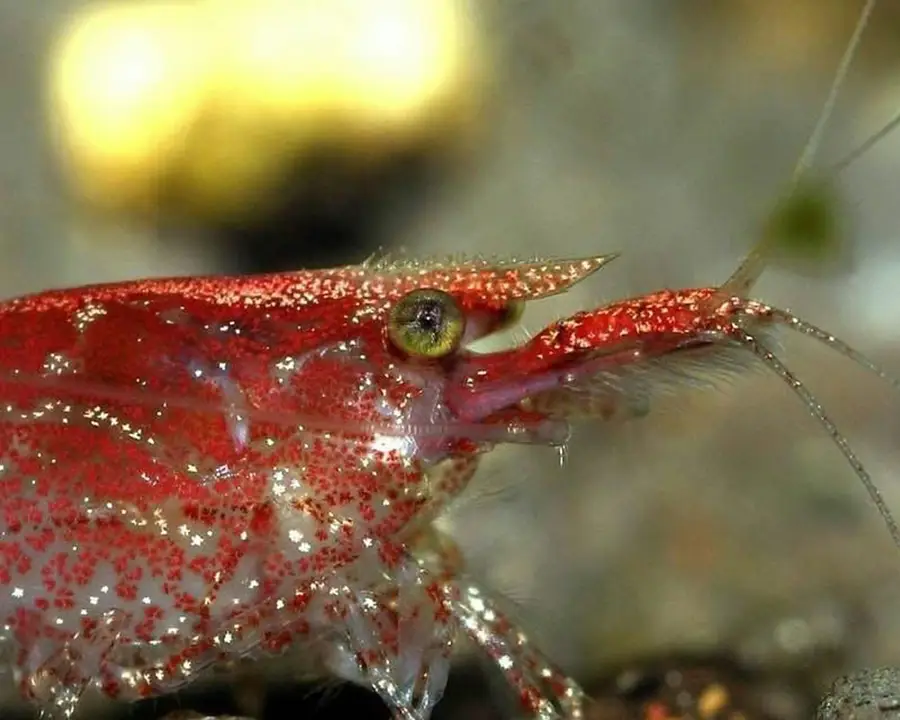
Breeding Cherry shrimp to be feeders or to simply keep your tank shiny and clean is actually quite easy! While they’ll happily breed anywhere, a separate tank is a good idea to avoid your fry being eaten by their non-shrimpy tankmates. Today we’re going to tell you how to properly breed Cherry shrimp.
We’ll also address some common questions about the process so that you’ll have all the information that you need to do it and to do it right. We’ll give you a hint; it’s actually much easier than you think!
What’s The Ideal Temperature For Breeding?
For breeding Cherry shrimp, the optimal temperature is going to be exactly 80 degrees. A little higher can lead to more aggressive breeding, but 80 is generally going to be best, as anything over 81 degrees starts to have an effect on the oxygen content of the water in your tank.
Cherry shrimp are prolific breeders, so it’s best to just go with 80 degrees, and your Cherry shrimp will be more than happy to breed!
What’s The Ideal pH For Breeding?
Cherry shrimp are quite particular when it comes to their PH levels, so the range that you need to have in your tank is going to be between 6.5 to 7.5. This is crucial for breeding, but the good news is that this isn’t much of a deviation from the standard 6.5 to 8.0 recommended for Cherries.
The slightly lowered maximum just makes the water a little bit easier on the babies that you will soon be hosting in your breeding tank.
How To Set The Tank Up For Breeding
Setting up a breeding tank isn’t hard, but it’s a little time-consuming. That said, your fry will have the best chance at survival with a second tank that you can closely monitor, so you’ll definitely want to get your tank ready for them and well in advance.
Let’s take a look at what you’ll need to consider
Start with the right tank size
Your breeding tank will need to be between 5 and 10 gallons, with 10 gallons being the preferred tank of choice. Cherry shrimp adults are generally kept at a ratio of 2 – 5 shrimp per gallon and while your fry will be tiny, keep in mind that Cherry females tend to lay 20 to 30 eggs per clutch.
Cherry shrimp babies take about 60 days to reach the juvenile stage, and about 15 days after that, they are considered to be adults. By starting off with the larger 10 gallons, your tank will be sufficient and a little easier to take care of than a smaller 5-gallon tank.
You’re Going To Need A Heater
Wild Cherry shrimp breed during the summer periods, and this is why 80 degrees is the optimal temperature to kick off a breeding cycle. Once the eggs have hatched, as long as you are maintaining a recommended range of 75 to 80 degrees, then both your adult and baby shrimp should be comfortable and happy.
Add Some Gravel – Dark Is Best
Dark gravel is less stressful for Cherry shrimp, as it gives them a feeling of being more camouflaged and hidden. You’ll also want to add a little vegetation so that they have places to hide, leaves to graze for biofilm, and dead plant matter to occasionally nibble.
Anubias, Bucephalandra, and Fern plants are all shrimp-tank staples that you should have a lot of in your main tank and at least a few of in your breeding tank as well (more is better, where this is concerned), so it’s a good idea to get these in your tank now.
Don’t Forget Your Light Source!
Your light source will help to promote algae growth, so we can’t forget this. Be sure to keep it on during the day if your tank isn’t close to another light source, and be sure to turn it off at night. By the time the tank is ready, that useful, delicious algae should be ready and waiting.
You’ll Need A Bubble Filter
While a bubble filter is standard fare for most tanks, you are going to need to cycle it for the best results. This must be done before any shrimp get added to the tank, as the ammonia and nitrites from a cycle will likely prove fatal to your Cherries.
So, if you have an old tank and a brand-new bubble filter, you’ll want to put it in a full tank and turn it on. Leave it running for a period of 4 weeks after that before testing the water and introducing any shrimp to the tank.
At this point, your tank should be ready, the water well-balanced, and should have a good bit of algae growth waiting for your Cherries. Still, we can’t introduce them until the waters are properly tested.
Note: Power filters aren’t recommended, as they can suck up the tiny fry and kill them. If you are using a power filter, you will need to cover the intake in some way to avoid this. You can put something with fine mesh, such as a piece of pantyhose, as long as it is readily secured.
A zip tie will do the trick, and as long as it stays in place for the 4-week cycle, then you should be okay. You can also use filter wool if you like, and the adults will probably graze on it as particles get trapped. Just be sure to get the intake baby-proofed to avoid any nasty issues later.
You’ll Need A Master Test Kit
You will need a master test kit to monitor the water to ensure that all of the proper levels are as perfect as possible. Drop kits tend to be a better choice than strips, as they have a longer shelf life, but if you’d rather do strips, then make sure that they are fresh because they tend to expire within 6 months.

API FRESHWATER MASTER TEST KIT 800-Test Freshwater Aquarium Water Master Test Kit, White, Single, Multi-colored
- Contains one (1) API FRESHWATER MASTER TEST KIT 800-Test Freshwater Aquarium Water Master Test Kit, including 7 bottles of testing solutions, 1 color card and 4 tubes with cap
- Helps monitor water quality and prevent invisible water problems that can be harmful to fish and cause fish loss
Here are the ideal parameters that you will want for your breeding tank:
- Temperature – 80 degrees is best, 77 – 81 is the minimum to maximum range that you can have for the tank.
- PH level – 6.8 is the ideal level, but between 6.2 and 7.3 is the range you must target to facilitate quick hatching and good health.
- Ammonia – This should be 0 ppm.
- Nitrite – This should be 0 ppm.
- Nitrate – Nitrate levels should be at less than 20ppm. 0 is even better, and you can get closer to that with plants present. Anything over 20ppm can cause fertility issues and is bad for your shrimp’s overall health.
You’ll want to make sure that the water is dechlorinated, as Cherry shrimp are quite sensitive to chlorine. Once this is done, your tank is all set up; then, we are ready to go into the breeding steps!
How To Breed Red Cherry Shrimp
Now that the tank is ready, it’s time to get your shrimp into it so that the breeding cycle may begin. Below we’ve got the steps that you will need to facilitate a successful breeding cycle. Take your time and do it right; with a little bit of experience, this is going to be second nature, but you want to do it very carefully your first couple of times.
Adding Cherry Shrimp To Your Breeding Tank
This is the most dangerous part of the process. The biggest killer of Cherry shrimp tends to be acclimation, so you want to make sure that you do this very carefully. Go to YouTube and type ‘the drip method shrimp’, and you can see a video on how the ‘Drip method’ is done.
The Drip method is a very slow acclimation process that helps to ensure that your shrimp may be carefully introduced to their new tank to avoid any shock from the change in their environment. It involves siphoning small amounts of water from the new aquarium into the ‘old water’ that your shrimp are already used to.
Check out the videos so that you can see it live, as this is going to be the best way to make sure that you do this right. Once you’ve learned it, you’ll have a reliable acclimation method that you can use anytime that you add new fish, and it really makes a difference with the very sensitive ones.
Slowly Raise The Temperature To 80°F If It’s Not There Already
Now that your Cherries are investigating their new tank (and they should be fairly active if they have acclimated properly), then it’s time to simulate the approach of summer. If your tank is still at 76 degrees, then slowly raise the temperature, making sure not to exceed 81 degrees.
You can do this gradually over 2-3 days just to make sure that the temperature is fully controlled. While we do this, we’ll want to raise the hardness level of the water as well.
Raise The Water Hardness A Little
Harder water will be another way to get your Cherry shrimp into ‘breeding mode’, as hard water is an instinctual indicator of mineral content – especially calcium needed for strong eggs and strong, little exoskeletons.
A few limestone chips in your filter should do just the trick. The general hardness should be between 100-200 ppm for Cherry shrimp.
Feed Your Shrimp Regularly
Now the environment should be ideal for breeding, and within a few weeks, you should notice the females carrying eggs curled in their tails. Your filter wool in the intake is critical at this point, as you should have babies very soon. Eggs typically take about 2 to 3 weeks to hatch, so protection from the intake is critical.
You want to make sure that you are feeding your shrimp regularly during this time. Every other day is good, with shrimp pellets, algae wafers, and the occasional blanched vegetables (spinach and zucchini are good, just boil them for 2 – 3 minutes before introduction to the tank).
When the babies are born, they don’t have a visible larval stage like some species. The young Cherry shrimp will just look like cute, miniature adults. Keep the feeding schedule at every other day but be sure to break up the foods into smaller amounts or purchase some powdered food, like spirulina algae, that the little guys can eat.
Mostly at this point, they’ll be eating biofilm and algae already present in the tank, but supplementing their diets with additional foodstuffs and calcium-rich foods will help them to grow and develop at a much faster (and healthier) rate.
You won’t be able to identify their genders until they mature, with full maturity being reached after a period of 2 – 6 months. That said, they will reach the juvenile stage in approximately one month.
Congratulations, you have successfully bred your first colony of Cherry shrimp!
How Often Do Cherry Shrimp Breed?
Cherry shrimp can breed at any time throughout the year, provided that you follow the instructions we have listed for stimulating the beginning of a breeding cycle. Once the eggs have been fertilized, they take around 20 to 35 days to hatch, and the babies will typically take about 60 days to mature.
These relatively quick cycles can make for a lot of babies very fast, so keep an eye on your tank temperature if you don’t want them to keep breeding regularly.
Will Cherry Shrimp Breed On Their Own?
Yes, Cherry shrimp are quite capable of breeding on their own if the conditions in the tank suggest that it’s a good time for breeding. Having lots of dense plant cover in your tank and extra hidey-holes such as ‘shrimp caves’ can help to minimize the chances of ‘surprise fry’ being gobbled up by the other fish in the tank.
Keeping the temperature lower than 80 should help to minimize this, and closer to 76 is even better.
Now You Know The Basics Of Breeding Cheery Shrimp
Today we have gone over the steps for successfully breeding a colony of Cherry Red shrimp. Cherry shrimp are easy to breed, just be sure to prepare your breeding tank well in advance, observe the proper water levels and temperature, and your shrimp will happily take care of the rest. Just make sure that there is plenty to eat!
Finally, take time with the acclimation to their new tank both when initially transferring the adults and when moving the newly-matured fry back to the original tank. With a little patience and strict adherence to our steps, your first new Cherry shrimp colony should be a smashing success!